
This tutorial is for anyone that is unfamiliar with Git or needs a refresher for this assignment. I am also new to Git and found that many tutorials do not do the best job of explaining Git concepts to a beginner.
My goal is to provide you with a basic example of how you can use Git to manage your own project. I will try to be very explicit in the instructions. If you find that I am going too slow for you, then skip some of the more detailed explanations. The pace is deliberately slow to accommodate anyone who prefers more time to digest this kind of information. I will also include links to the tutorials that helped my understanding. You may find that they are more useful to you than this one.
It is likely that many of you are much more experienced than myself with Git and GitHub. If you find that anything in this tutorial is unclear, misleading or completely wrong, please let me know. Let’s get started.
NOTE: The following block is the format I will be using for commands. The '$' is not typed. It is there to let you know that the command will be typed in the command line.
While reading this tutorial, it may be useful for you to keep this link open in new tab.
Git is something called a version control system (VCS). It allows for tracking changes in project files. Companies, organizations and single users can utilize Git to track any kind of file but it is primarily used for software code. We will explore different concepts of Git that will, hopefully, make this more concrete.
Not only is Git useful for tracking changes in a software project, but it is also a very popular platform used by many of today’s largest companies. As future computer scientists and engineers it is important to understand how this platform works. You will likely end up with an internship or full-time job that requires you to use Git. Hopefully at the end of this tutorial you will begin to see the usefulness of Git.
A little history for anyone who is interested.
First of all, GitHub is not Git. GitHub is the largest and most well known host of Git repositories. Anyone can create a GitHub account and start sharing their projects with the world. GitHub is free for open source and is a great way of getting involved in open source projects.
In this tutorial we will be using Git mostly through the command line. We will also be using GitHub to host our repository and will do some administrative tasks on the website.
To host our repositories we can either sign up for a public GitHub account here or go to Texas A&M's GitHub and sign in with your net-id and password to use free private repositories. For the purpose of programming assignment two you will be using Texas A&M's enterprise GitHub account.
Next you will need a way to use Git in the command line. I will include solutions to this for all three major platforms (Windows, Mac, Linux).
There are a few ways you can do this. I will include a few below.
Open up terminal and:
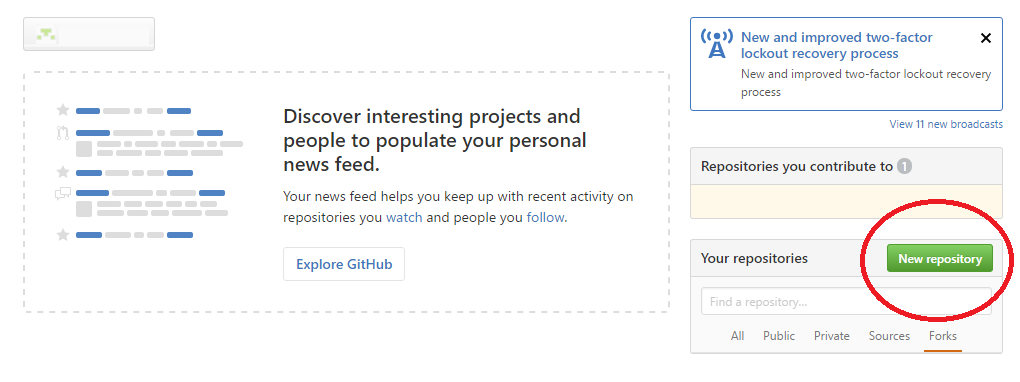
Let’s say we want to create a small library of math functions in C++ and we want to manage this project with Git. We also want to share this library with the world so we will host the repository on GitHub. To do this, let’s first create a new repository on GitHub. Navigate to GitHub and sign into your account. On the homepage, there is a button that says “New Repository.” Click this button.
You can name your repository whatever you like. We will make this repository private (this is required for your programming assignment). We will discuss the .gitignore option soon and we will choose to not have a README file for this repository. In general, you would initialize repositories with a README file to explain what your project is and how to use it.

You will now see a screen that looks like this.
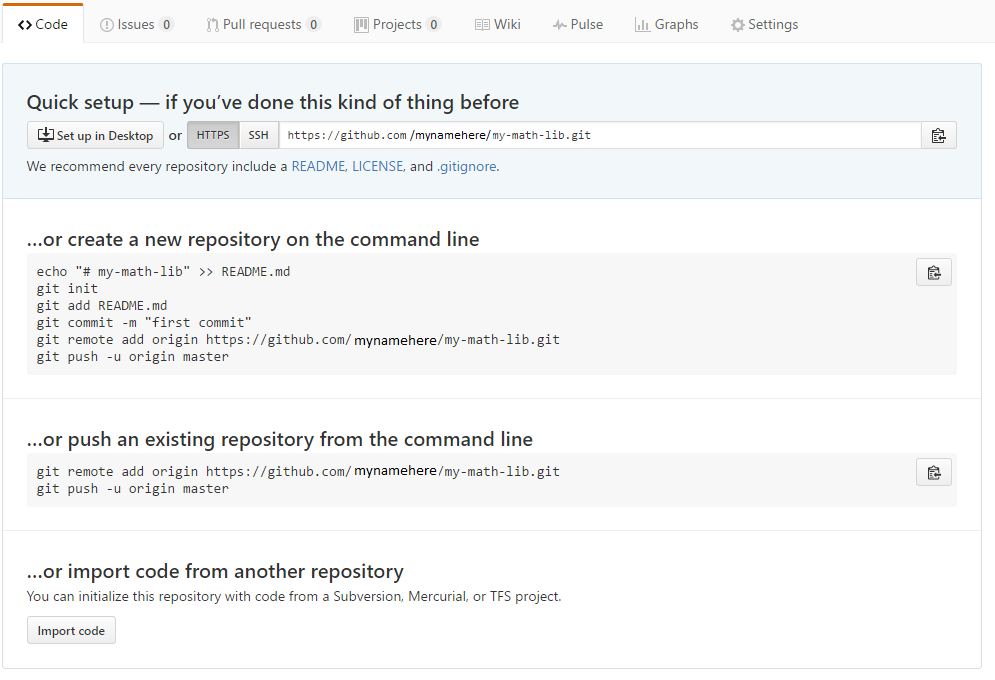
Copy the https link and place it somewhere for later use. This is an empty repository. We want to be able to create and edit files on our local machine and then push these changes to our new repository for the world to see!
We are nearly ready to start creating our C++ library. Before we do this, let’s setup our local git repository. Open up the command line and get ready to start. Once you are on the command line, create a directory anywhere you like.
You are now in the directory that will soon become a local Git repository for our C++ math library project. First let’s use some git commands to let git know who we are.
These commands will not repeat anything back to you. However, if you want to confirm the changes we just made, use the following commands:
Upon execution of these commands git should repeat back to you your GitHub username and email that you just gave it.
Now, let’s initialize our local Git repository using the following command
Git should reply with something similar to this:
This is letting you know that an empty repository was set up in the current folder. I should reiterate that Git is NOT GitHub. If you wanted to, you could use this Git environment without ever interacting with GitHub or any other Git repository hosting service. However, in this tutorial we will be interacting with our newly created GitHub repository.
Type the following into your command line while in your Git repository:
You should be able to see a directory called “.git” in the repository.
If at any time you want more information on these Git commands or just want to explore the scope of Git, use the command:
This will give you many git commands with a short description of them. If you want more detail, use:
This will give you a more detailed explaination of a command. For more information on 'git help' see this link.
We now want to start to create our math library. You can copy and paste what you see below or download the main and header. Place these files in your local Git repository.
main.cpp
#include<iostream>
#include "MyMathLib.h"

int main()
{
	//used for testing our math library
	//std::cout << add(1,2) << std::endl;
	//std::cout << subtract(2,1) << std::endl;
	//std::cout << multiply(2,2) << std::endl;
	//std::cout << divide(4,2) << std::endl;

}
MyMathLib.h
int add(int a, int b) // a + b
{

}

int subtract(int a, int b) // a - b
{


}

int multiply(int a, int b) // a * b
{


}

int divide(int a, int b) // a / b
{


}
Any files we add or changes we make to files will automatically be recognized by our Git repository. To confirm this we can use this command:
Which should return something similar to the following along with some other things we will talk about soon:
Git is telling us that it recognizes that we have some new files in our repository that are not being tracked. We want these files to be tracked so we will use the following commands to start tracking them:
Alternatively we could have used the command “git add -A” to add both of them. The Git “add” command is also used to add changes within files. We will see this soon.
Let’s confirm that Git is now tracking our files. Use the following command again.
This should return something similar to the following.
What we did by using the “git add” command was twofold. We told our Git repository that we wanted to track them and we moved them into something called the staging area. This staging area is where all the changes we’ve made since our previous commit will be placed while waiting for a 'commit.' Let’s talk about commits.
You can think of a commit as being a snapshot of your project history. We are saying that we are happy with the changes that we’ve made since our previous commit. We want Git to store this stage of our project for review later or to revert to in the case that something goes wrong in the future. Let’s make our first commit. Use the following command:
The ‘-m’ lets Git know that the next element of the command should be a message. This message is very simple. When working on an actual project you should make these more descriptive. This helps you and anyone working with you better understand the progression of the project.
This should reply with a message saying two files were changed and some more details about this commit. Let’s use another command to further confirm this.
This will reply letting you know that your working directory is clean.
This will show you the history of all the commits that you’ve made. Right now there should only be one. Let’s move on actually start to implement our library of math functions. We will start with our “add” function. Lets update it so that the function returns the value of a + b.
int add(int a, int b) // a + b
{
	return a + b;
}
Then uncomment the first print line in our “main.cpp” so that we can test our function.
int main()
{
	//used for testing our math library
	std::cout << add(1,2) << std::endl;
	//std::cout << subtract(2,1) << std::endl;
	//std::cout << multiply(2,2) << std::endl;
	//std::cout << divide(4,2) << std::endl;
};
Let’s go ahead and compile our code to see if everything is working properly.
As you might expect, we get a result of ‘3’ from our test. Since we are satisfied with these results were are almost ready to make a commit on these changes. Before we do so let’s take a look at another Git command to help us track our progress. Execute the following command:
You should be able to see the changes that we made to our files. Specifically, implementing our add function and uncommenting our print statement. This shows us changes since our last commit. If we had more than one previous commit we could also view changes between any two commits (type ‘git help diff’ for more information). When you are done viewing the differences, you can press ‘q’ to quit this mode.
Now let’s add our files to the staging area.
Let’s confirm that with ‘git status.’
In addition to the changes to our file, we also have this new file in the staging area. This is the executable binary file generated by the C++ compiler. We don’t need this file tracked by Git but we would like to continue to use ‘git add -A’ without worrying about this file being placed in the staging area.
To solve this dilemma we are in we can use a .gitignore file. Items or directories listed in this file will not be tracked by Git. First let’s unstage the undesired file.
This will unstage the test files. Let’s create our .gitignore file. To do this:
This will create a file called '.gitignore in your current directory. If you do not see this file, try enabling showing hidden files. Open the '.gitignore' file and type ‘test’ on the first line. Save this file. Let’s go back to the command line and do the following.
Git has added our .gitignore file to the list of files to be tracked and not included test. Perfect! Let’s finally commit.
Now that we have created the first function in our math library (yay!) we can push these changes up to our GitHub repository. Right now, all Git knows about us is our GitHub username and email. We need to tell Git where to send our repository. Do you still have that link from earlier?
If not, go get that link again. We can tell Git where to send our repository by using the following command.
This tells Git to add a way of communicating with our remote repository. ‘Origin’ is the name we gave to this way of communicating with our repository. We can confirm this by using:
This should print out something like this:
If for some reason you messed this up you can use ‘git remote remove origin’ and then add it again. Let’s push our changes to our remote repository.
This will prompt you for your user name and password
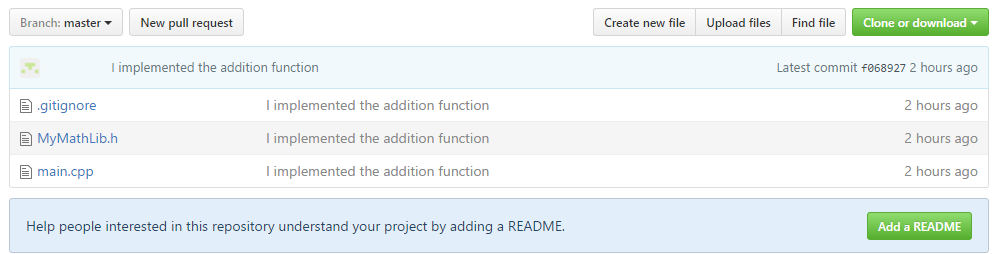
If successful, you can navigate to your GitHub repository and view your project. Go check it out!
What we have just done is very exciting and actually very bad practice. In the next section I will introduce the concept of branching and explain why we shouldn’t do what we just did.
Branching is one of the most important and useful concepts in Git. I will demonstrate the concept of branching by continuing our math library project.
We are currently on the ‘master’ branch of our project. In fact this is the only branch on our project at this time. When we used the command ‘git push origin master’ we were telling Git to push the branch we are currently on in our local repository's to the master branch on our remote GitHub repository. In this case, our GitHub repository was completely empty so the master branch was created when we pushed our local repository up to our remote one.
The next move in our project would be to implement the subtract function. Well, we could do what we did for the addition function and simply write it, test it, commit and push the changes to the remote. The only issue is that the master branch is supposed be deployable at all time. Let me explain what this means.
Let’s pretend what we are doing is more complicated than writing ‘return a + b.’ Git was originally developed by Linus Torvalds to manage the development of Linux kernels. While I have no experience with development of this magnitude, I am sure that testing and making sure that everything is bug free is no trivial task. It would be useful to have a way to test a new feature without compromising the integrity of the project. To do this you could copy and paste an entire linux kernel or we could use a branch.
Let’s see how we can view our branches. Use the following command:
Which should return:
This lets us know that we have a branch on our local repository called ‘master’ and the ‘*’ indicates that we are currently on this branch. Let’s use the same command with a ‘-a’ flag to show branches on our local and remote repository.
Which will return:
This shows us that there is also a master branch on remote/origin repository.
To avoid compromising our precious math library, let’s create a branch for our subtraction function.
This creates a new branch on our local repository called ‘subtract.’ Let’s confirm this.
Which will return:
Now we have a branch called subtract. Great! Let’s use the ‘checkout’ command to move to this branch.
You are now on the subtract branch. This can be confirmed with ‘git branch.’ We can now develop our subtract function without the possibility of compromising our master branch. People can continue to clone and use your math library while you improve it in the background. This is all around a good thing for everyone. I hope you are starting to see the usefulness of Git.
Let’s go ahead and implement the subtract function as follows.
int subtract(int a, int b) // a - b
{
	return a - b;
}
Also, uncomment the next print statement in main and comment out the print statement we used to test the add function.
int main()
{

	//used for testing our math library
	//std::cout << add(1,2) << std::endl;
	std::cout << subtract(2,1) << std::endl;
	//std::cout << multiply(2,2) << std::endl;
	//std::cout << divide(4,2) << std::endl;

};
Let’s test it out and see if it gives us the correct output.
This should return a one.
Two minus one is indeed one! At this point we’re pretty sure our implementation is correct. In a real project you should definitely continue to do more testing to ensure correctness. Given that this is a trivial example we will say that it is a deployable program at this point. Now we can begin the process of committing our changes.
Now that we have committed these changes we can push our changes to our remote repository.
Input your username and password.
This will create a new branch on our remote repository and place our updated program on that branch. You should go check it out!
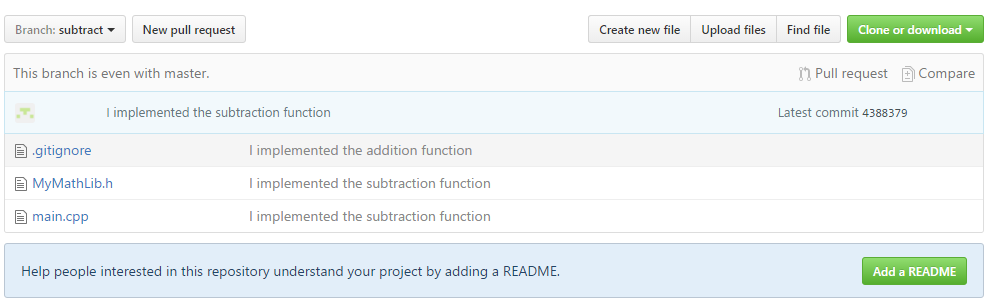
You should be able to see that we now have two branches and your updated program resides in your new branch. You can also confirm this with the following on the command line:
Our subtraction function is complete and correct. We want the world to know that we have properly implemented the subtraction function and that it is now a usable part of our program. We should begin the process of merging this branch with our master branch.
To do this, let’s switch back to our master branch.
Once we are on the master branch we can use the command:
This command does what it sounds like. It merges the changes you’ve made on the subtract branch with the current branch you’re on. In this case, the master branch. Now push these changes to the remote repository.
Input username and password if prompted.
Our code is now deployed to our remote repository's master branch for anyone to use.
We have learned a lot so far. If you’ve followed this up to this point, you now know enough to work on your own projects. You should be very excited!